# JavaScript API Client
> Source: https://docs.recombee.com/js_client
> For the complete documentation index, see [llms.txt](/llms.txt).
# JavaScript API Client
**Table of contents**
* [Install](#install)
* [Configure](#configure)
* [Send Interactions](#send-interactions)
* [Get Recommendations](#get-recommendations)
* [Personalized Search](#personalized-search)
* [Recommend Next Items](#recommend-next-items)
* [Batch Requests](#batch-requests)
* [Optional Parameters](#optional-parameters)
* [Error Handling](#error-handling)
* [Integration Example](#integration-example)
* [1\. Create a Recombee Account](#-create-a-recombee-account)
* [2\. Upload the Catalog](#-upload-the-catalog)
* [3\. Integrate Recombee into Your Website](#-integrate-recombee-into-your-website)
* [Identifying Users Using Google Analytics](#identifying-users-using-google-analytics)
This library allows you to request recommendations and send interactions between users and items (such as views, bookmarks, or purchases) to Recombee. It is a thin wrapper around the [Recombee API](/api) and provides a simple way to interact with it.
Client-side SDK
This SDK is designed for use in browser-based or other client-side applications, including frameworks like React Native and NativeScript.
For server-side integration with the Recombee API, use our dedicated [Node.js library](https://github.com/recombee/node-api-client)or other available [server-side SDKs](/api_clients#server-side).
To use this client-side SDK in a full-stack framework (e.g., Nuxt or Next.js), additional configuration is required. See [Usage in Full-stack frameworks](#usage-in-full-stack-frameworks) for more information.
For security reasons, it is not possible to change the item catalog, such as the properties of items, using this SDK. To send your Catalog to Recombee, use one of the following methods:
* Use one of our server-side SDKs, for example using a script which runs periodically (see [Managing Item Catalog](/getting_started#getting-started-catalog) for more details),
* Or set up a [Catalog Feed](/catalog_feeds) in the [Admin UI](https://admin.recombee.com/).
[GitHubSee the implementation, contribute, or report issues](https://github.com/Recombee/js-api-client)[API ReferenceList of all available endpoints with examples](/api)
## Install
There are two ways to include the library in your project:
**1\.
```
If you require, you can download [recombee-api-client.min.js](https://github.com/recombee/js-api-client/blob/master/dist/recombee-api-client.min.js) and host it on your site or CDN.
```
```
After this script is included, you can access the API Client using the global `recombee` object.
Alternatively, if you want to use the library in ESM code, you can import `recombee-api-client.min.mjs` as follows:
```
```
**2\. Package managers:**
Alternatively, you can install the SDK via a package manager:
```npm
npm install recombee-js-api-client
```
```yarn
yarn add recombee-js-api-client
```
```pnpm
pnpm add recombee-js-api-client
```
```bun
bun add recombee-js-api-client
```
Afterwards, you can import the `recombee` object as follows:
```
import recombee from 'recombee-js-api-client'
// or
const recombee = require('recombee-js-api-client');
```
The library ships with types, so you should get autocompletion in your IDE out of the box. If you're using TypeScript, it should recognize these correctly and warn you about any type errors.
## Configure
In order to use the API, you will need to create an instance of the `ApiClient` class. You will need:
* the **ID of your database**,
* the **public token**.
You can find these in the Admin UI, in [your Database's Settings page](https://admin.recombee.com/go-to-database/settings), under **API ID & Tokens**. Along with this information, you can also find the full code snippet for initializing the client, including the above-mentioned parameters.
Ideally, you should only have one instance of the `ApiClient` in your application, as it is a lightweight object and can be reused for multiple requests. Feel free to export it from a module and import it wherever you need it.
```
// Initialize the API client with the ID of your database and the associated PUBLIC token
export const client = new recombee.ApiClient('database-id', '...db-public-token...', {
region: 'us-west', // the region of your database (default: 'eu-west')
});
```
You can also set several optional parameters when initializing the client:
```
const client = new recombee.ApiClient('database-id', '...db-public-token...',
{
// Use this if you were assigned a custom URI by the Recombee Support team (default: none)
baseUri: 'custom-uri.recombee.com',
// Whether to use HTTPS - can be used for debugging (default: true)
useHttps: true,
}
);
```
## Send Interactions
After you have initialized the client, you can send interactions between users and items.
The individual interactions are classes within the `recombee` object (e.g. `recombee.AddBookmark`, `recombee.AddPurchase`, etc.). After you create an instance of the interaction, you can send it using the `send` method of the client.
Each interaction has both mandatory and optional parameters.
The most important optional parameter is `recommId` \- the ID of the recommendation to which the interaction belongs. Providing this ID allows you to track successful recommendations. For more information, read about [Reported Metrics](/admin_ui#reported-metrics).
For a full list of interactions, along with their parameters, refer either to the types in the library or the [API Reference](/api).
```
// Either create the interaction first and then send it
const bookmark = new recombee.AddBookmark('user-13434', 'item-256');
await client.send(bookmark);
// Or send it directly
await client.send(new recombee.AddCartAddition('user-4395', 'item-129', {
recommId: '23eaa09b-0e24-4487-ba9c-8e255feb01bb',
}));
await client.send(new recombee.AddDetailView('user-9318', 'item-108'));
await client.send(new recombee.AddPurchase('user-7499', 'item-750'));
await client.send(new recombee.AddRating('user-3967', 'item-365', 0.5));
await client.send(new recombee.SetViewPortion('user-4289', 'item-487', 0.3));
```
If you want to send multiple interactions at once, you can use the `Batch` request:
```
const batch = new recombee.Batch([
new recombee.AddBookmark('user-13434', 'item-256'),
new recombee.AddCartAddition('user-4395', 'item-129', { cascadeCreate: true }),
new recombee.AddDetailView('user-9318', 'item-108'),
]);
await client.send(batch);
```
You can then use `try/catch` to handle any errors that may occur.
```
try {
await client.send(
new recombee.AddPurchase('user-14125', 'item-137', { cascadeCreate: true })
);
console.log('Purchase sent');
} catch (err) {
console.error('Error sending purchase:', err);
}
// Console: Purchase sent
```
## Get Recommendations
With an initialized client, you can also request recommendations.
There are multiple types of recommendations, such as:
* [Recommend Items to User](/api#recommend-items-to-user),
* [Recommend Items to Item](/api#recommend-items-to-item),
* [Recommend Item Segments to User](/api#recommend-item-segments-to-user) (these can be categories, genres, artists, etc.),
* or [others](/api#recommendations).
Each recommendation request is a class within the `recombee` object (e.g. `recombee.RecommendItemsToUser`, `recombee.RecommendItemsToItem`, etc.).
After you create an instance of the recommendation request, you can send it using the `send` method of the client.
| Promise | |
| ---------- | --------------------------------- |
| On success | Return value is a Response object |
| On error | Throws an Error |
```
// Get 5 recommendations related to 'item-356' for 'user-13434'
const response = await client.send(
new recombee.RecommendItemsToItem("item-356", "user-13434", 5)
);
console.log(response);
// {
// recommId: 'f080784b-1e8b-4328-8d59-28d962301007',
// recomms: [
// {
// id: 'item-123',
// values: { title: 'Product 123', img_url: 'https://example.com/img123.jpg' }
// },
// {
// id: 'item-456',
// values: { title: 'Product 456', img_url: 'https://example.com/img456.jpg' }
// },
// ...
// ]
// }
```
For a full list of request parameters and possible responses, visit the [API Reference](/api#recommendations).
### Personalized Search
[Personalized full-text search](/api#search-items) is requested in the same way as recommendations:
```
const searchQuery = " ... search query from search field ....";
const response = await client.send(
new recombee.SearchItems("user-13434", searchQuery, 5)
);
console.log(response);
// {
// recommId: 'f080784b-1e8b-4328-8d59-28d962301007',
// recomms: [
// {
// id: 'item-123',
// values: { title: 'Product 123', img_url: 'https://example.com/img123.jpg' }
// },
// {
// id: 'item-456',
// values: { title: 'Product 456', img_url: 'https://example.com/img456.jpg' }
// },
// ...
// ]
// }
```
### Recommend Next Items
If you are implementing features like infinite scroll or pagination, you can use the `RecommendNextItems` request to load recommendations progressively.
This means you can fetch the next set of recommended items without repeating the ones you have already displayed.
To use this functionality, you must provide the `recommId` from the initial recommendation request.
For more details, see the [Recommend Next Items](/api#recommend-next-items) documentation.
```
// Fetch the initial set of 5 recommendations for user-13434
const initialRecomms = await client.send(
new recombee.RecommendItemsToUser("user-13434", 5)
);
// Get the next 3 recommendations as user-13434 scrolls down
const nextRecomms = await client.send(
new recombee.RecommendNextItems(initialRecomms.recommId, 3)
// Use the recommId from the previous request ^
);
```
### Batch Requests
You may encounter a situation where you display recommendations in multiple places on your website.
In such cases, you can use the `Batch` request to send multiple recommendation requests at once. This can help reduce the number of HTTP requests and improve performance.
For example, you can request the most popular items, as well as items related to a specific user or item, in a single Batch:
```
const batch = new recombee.Batch(
[
new recombee.RecommendItemsToItem("item-356", "user-13434", 5, { scenario: "because-you-watched" }),
new recombee.RecommendItemsToUser("user-13434", 5, { scenario: "new-releases" }),
new recombee.RecommendItemsToUser("user-13434", 5, { scenario: "popular" }),
],
{
distinctRecomms: true,
}
);
const responses = await client.send(batch);
for (const response of responses) {
console.log("Because You Watched:", response[0]);
// Because You Watched: { recommId: '...', recomms: [ ... ] }
console.log("New Releases:", response[1]);
// New Releases: { recommId: '...', recomms: [ ... ] }
console.log("Popular:", response[2]);
// Popular: { recommId: '...', recomms: [ ... ] }
}
```
The optional parameter `distinctRecomms` of the `Batch` ensures that the recommended items are not repeated across the responses.
You can find more information about Batch requests in the [API Reference](/api#batch).
### Optional Parameters
Recommendation requests support various optional parameters to customize their behavior. For a comprehensive list, refer to the [API Reference](/api#recommendations). Below is an example showcasing some commonly used parameters:
```
const response = await client.send(new recombee.RecommendItemsToUser('user-13434', 5,
{
// Scenarios help identify the context where recommendations are displayed
// and can be customized in the Admin UI at https://admin.recombee.com
scenario: 'homepage',
// Include detailed properties of the recommended items in the response
returnProperties: true,
// Specify which properties to include (requires returnProperties = true)
includedProperties: ['title', 'img_url', 'url', 'price'],
// Apply a ReQL filter to refine recommendations,
// e.g., "Recommend only items with a title that are in stock."
filter: "'title' != null AND 'availability' == \"in stock\""
// Note: You can define scenario-specific filters in the Admin UI.
}
));
```
## Error Handling
The API client throws errors when an error occurs.
The possible errors are:
| Error | Cause |
| ------------------------------ | ------------------------------------------------------- |
| ApiError | Base class for all errors |
| ResponseError extends ApiError | The API returned an error code (e.g. invalid parameter) |
| TimeoutError extends ApiError | Request timed out |
We are doing our best to provide a reliable service, but sometimes things can go wrong. For this reason, we recommend that you always handle exceptions and provide fallbacks in your application.
For example, when requesting recommendations, a fallback could be to display a generic set of items or an error message to the user.
## Integration Example
### 1\. Create a Recombee Account
To follow this example, you'll need a Recombee account. If you don't already have one, you can [sign up for free](https://admin.recombee.com/sign-up).
If you weren't invited to an existing Organization or Database, Recombee will automatically create one for you during registration.
### 2\. Upload the Catalog
The next step is to upload your item catalog to Recombee. You can do this using one of the following methods:
* API-based upload: Follow the instructions in our [Managing Item Catalog guide](/getting_started#getting-started-catalog).
* Catalog Feed: Set up a feed in the [Admin UI](https://admin.recombee.com/).
For this tutorial, we'll use a sample Google Merchant product feed. You can find the sample file at this URL:
```
https://raw.githubusercontent.com/recombee/js-api-client/refs/heads/master/examples/product_feed_sample.xml
```
After adding the feed to the Admin UI and waiting for it to process, you'll be able to see the uploaded items in the Items section of your Database.
### 3\. Integrate Recombee into Your Website
Let's assume we want to show recommendations on the product page of item `product-270` to a user with the ID `user-1539`.
The following code example uses HTML and vanilla JavaScript to send the Detail View interaction of the product by the user and request 3 related items from the Recombee API:
index.html
```
Recombee Integration Example
Related products
```
main.js
```
// A simple function for rendering a box with the recommended product
function showProduct(title, description, link, imageLink, price) {
return [
`
`,
].join('\n');
}
// Initialize client
const client = new recombee.ApiClient(
'js-client-example',
'dXx2Jw4VkkYQP1XU4JwBAqGezs8BNzwhogGIRjDHJi39Yj3i0tWyIZ0IhKKw5Ln7',
{ region: 'eu-west' },
);
const itemId = 'product-270';
const userId = 'user-1539';
// Send Detail View
void client.send(new recombee.AddDetailView(userId, itemId));
try {
// Request recommended items
const response = await client.send(
new recombee.RecommendItemsToItem(itemId, userId, 3, {
returnProperties: true,
includedProperties: ['title', 'description', 'link', 'image_link', 'price'],
filter: "'title' != null AND 'availability' == \"in stock\"",
scenario: 'related_items',
}),
);
// Show recommendations
const recomms_html = response.recomms
.map((r) => r.values)
.map((vals) =>
showProduct(
vals['title'],
vals['description'],
vals['link'],
vals['image_link'],
vals['price'],
),
);
document.getElementById('relatedProducts').innerHTML = recomms_html.join('\n');
} catch (err) {
console.error('Could not load recomms: ', err);
}
```
You should see something like this:
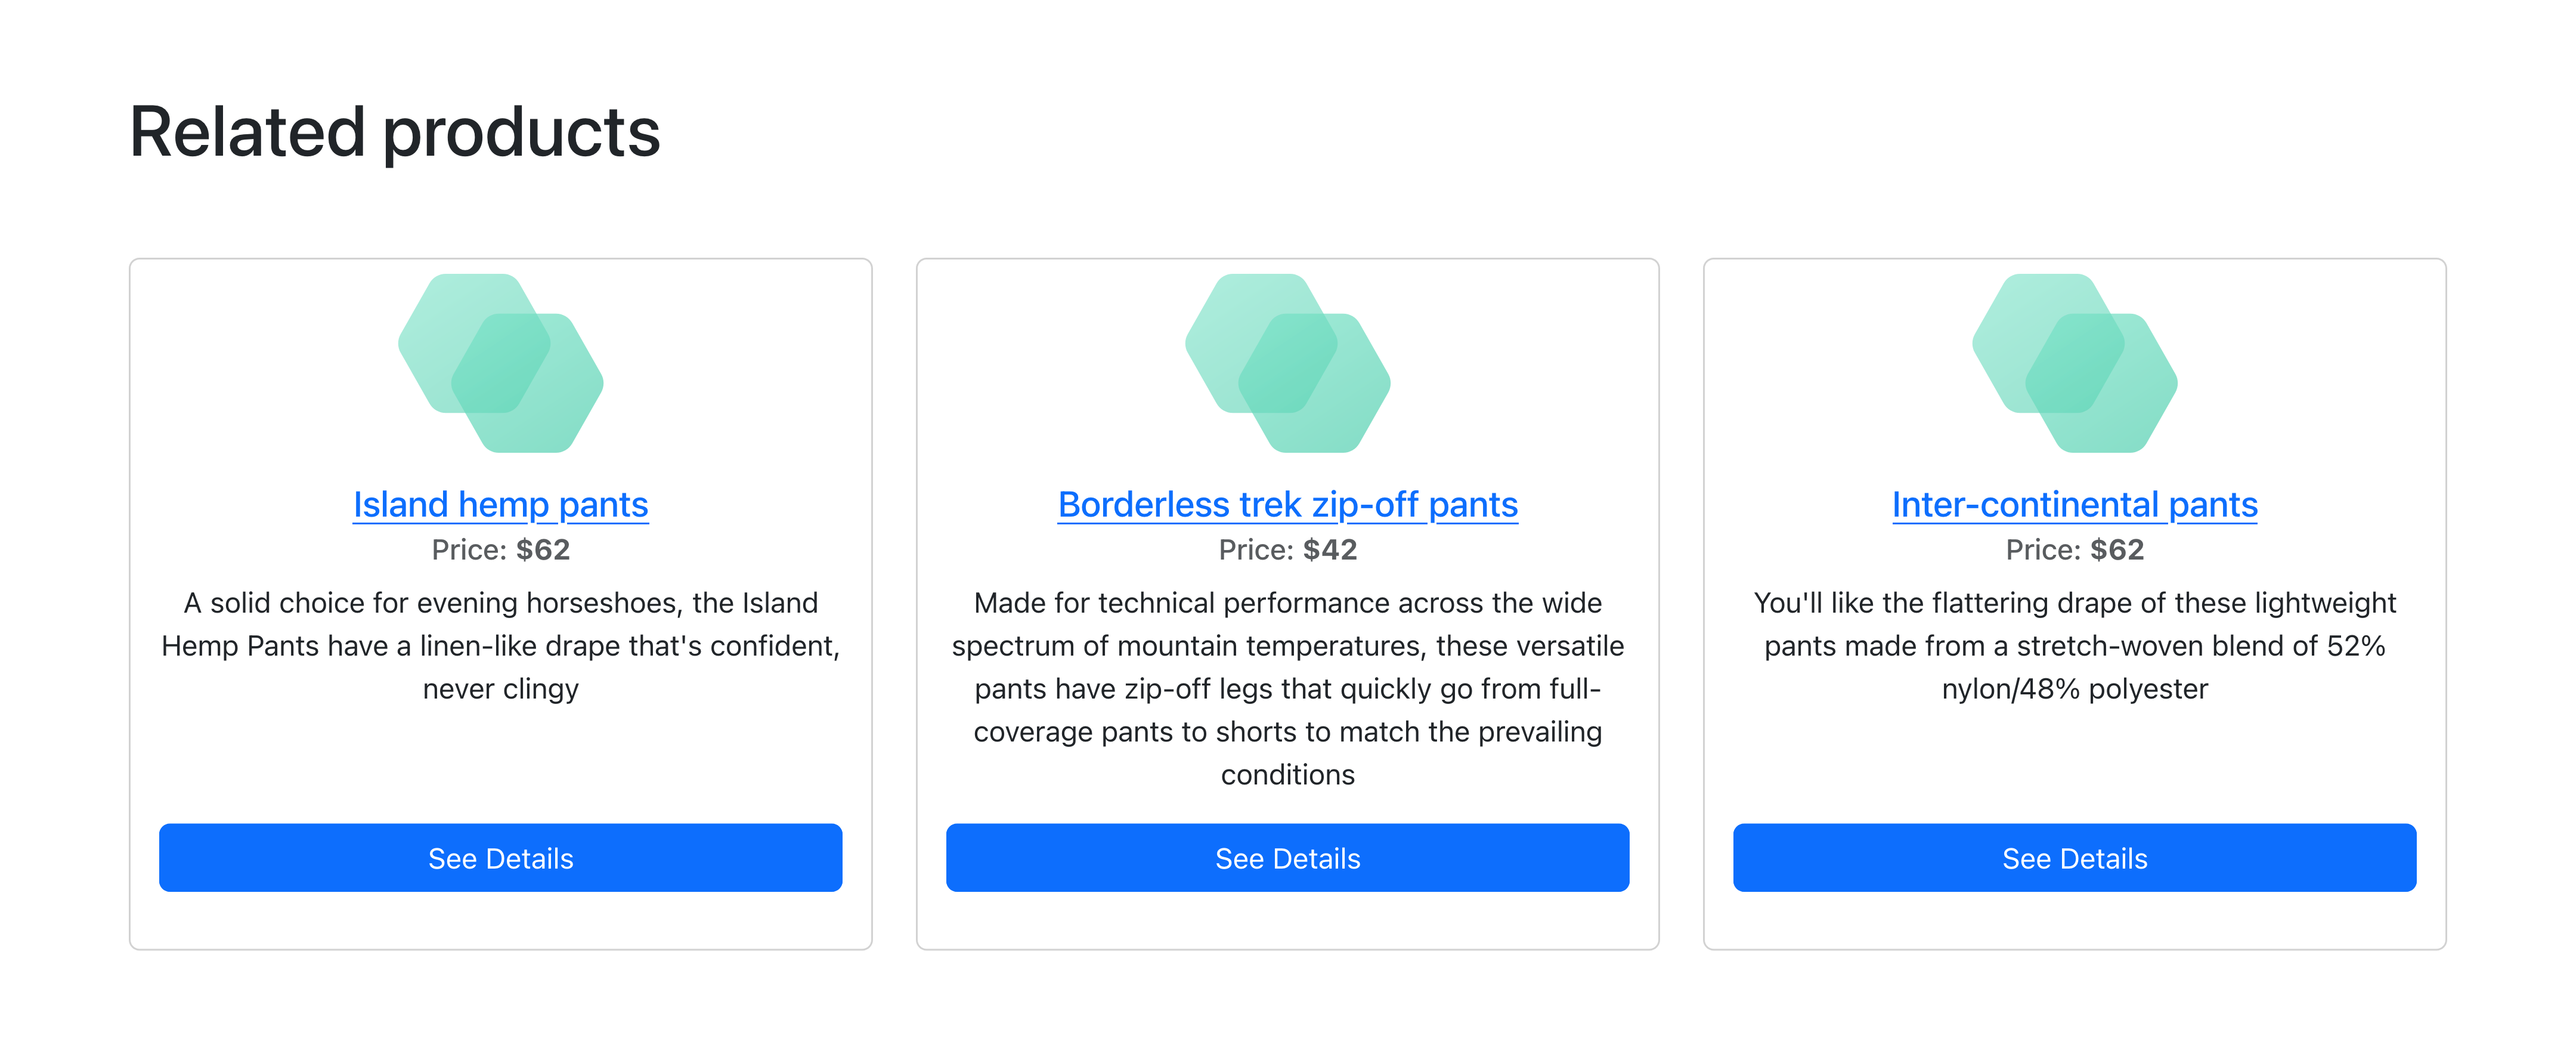
Notice how the properties returned by `returnProperties`, in combination with `includedProperties`, were used to show titles, images, descriptions and URLs.
### Identifying Users Using Google Analytics
In order to achieve personalization, you need a unique identifier for each user.
One of the ways to achieve this can be using Google Analytics. You would need to add the following to the previous example:
index.html
```
```
main.js
```
const client = new recombee.ApiClient(/* ... */);
// Optional check: if you want to ensure gtag is defined
// (this is often not necessary if you define gtag in HTML as shown)
if (typeof gtag !== 'function') {
window.dataLayer = window.dataLayer || [];
function gtag() {
dataLayer.push(arguments);
}
}
// Initialize GA4
gtag('js', new Date());
gtag('config', 'G-XXXXXXXXXX'); // Replace with your GA4 measurement ID
gtag('get', 'G-XXXXXXXXXX', 'client_id', async (clientId) => {
void client.send(new recombee.AddDetailView(clientId, itemId));
try {
const response = await client.send(
new recombee.RecommendItemsToUser(clientId, 3, {
returnProperties: true,
includedProperties: ['title', 'description', 'link', 'image_link', 'price'],
filter: "'title' != null AND 'availability' == \"in stock\"",
scenario: 'homepage',
}),
);
const recomms = response.recomms;
// ...
} catch (error) {
// Handle errors
}
});
```
This example uses the [Recommend Items to User](/api#recommend-items-to-user) API endpoint. You can use this recommendation type in various places, such as on your homepage.
 `,
` `,
`
`,
` `,
`