Recombee Shoptet GTM Integration
In order to set up GTM integration, you will need to create a Google Tag Manager account.
Recombee GTM integration supports four types of user interactions in the Shoptet platform:
- Add to cart
- Detail view
- Purchase
- Rating
Shoptet Setup
Follow instructions for initial setup.
https://podpora.shoptet.cz/hc/cs/articles/360003160871-Google-Tag-Manager
Creating triggers
Triggers are needed in order to add support for sending Add to cart and Purchase interactions.
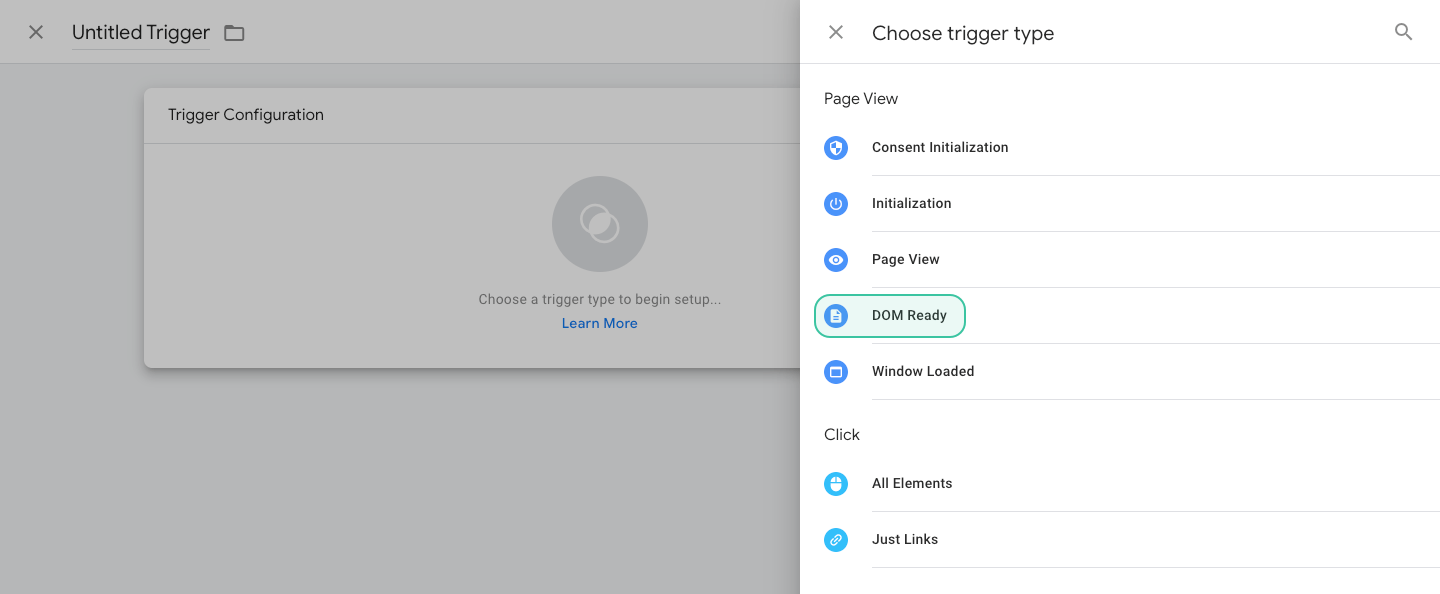
Select Triggers in the menu and add a new trigger on the DOM Ready event and also Custom Events called “AddToCart” and “Purchase”.
DOM Ready Event
- Navigate to the Triggers section
- Click the New button and choose the DOM Ready type
- On the triggers fire selection keep the All DOM Ready Events and name the trigger accordingly
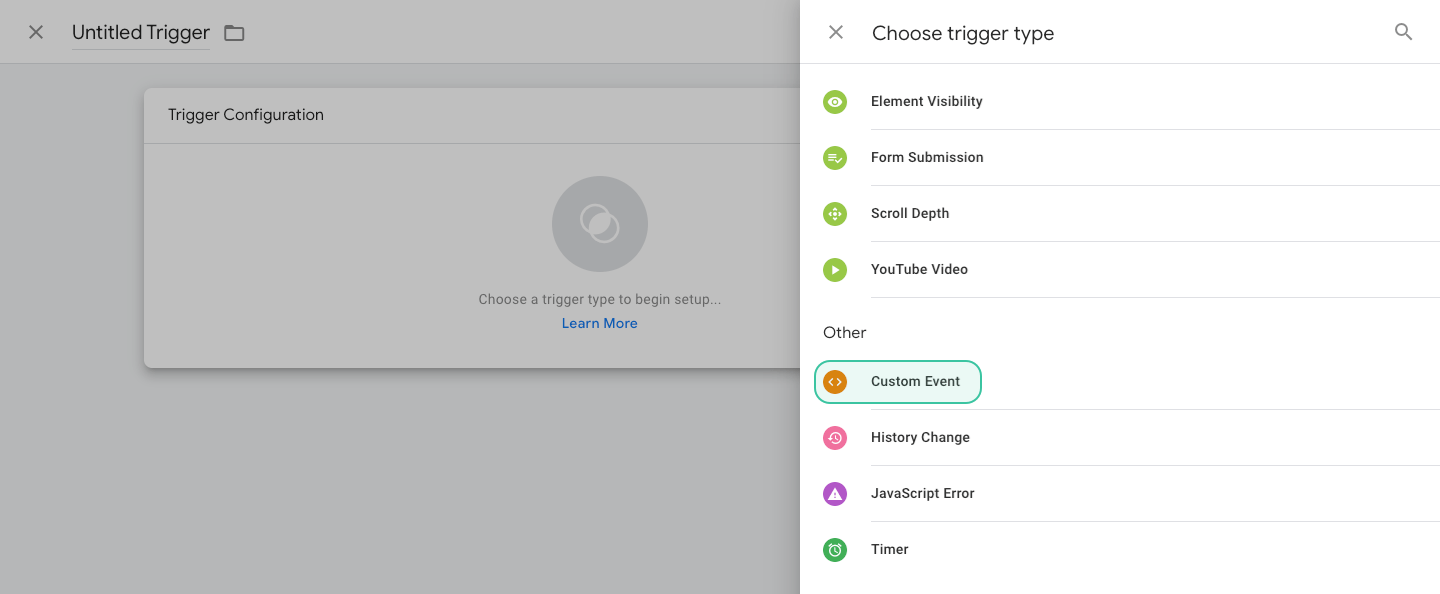
AddToCart Event
- Navigate to the Triggers section
- Click the New button and choose the Custom Event type
- Fill the Event name with “addToCart” and select the All Custom Events option below.
Creating tags
Our custom GTM tags will send interactions to Recombee. You can create tags for all supported interactions or just those you want to send.
GTM Gallery Integration
We have published Recombee Shoptet integration, which you can use for easy setup.
Go to the Tags section, click New and search for the Recombee Shoptet interactions template.
Manual template import
While we are waiting for Google approval to be included in the GTM template gallery, you can simply import the Recombee Shoptet template for use.
Download the template file from our Github repository (GTM Integration Github - template.tpl)
- In GTM select Templates in the left side menu and click on New
- Import the template by clicking on the dots and select Import
- Select downloaded template.tpl file and save your new template
Now you can use our template when creating your tags.
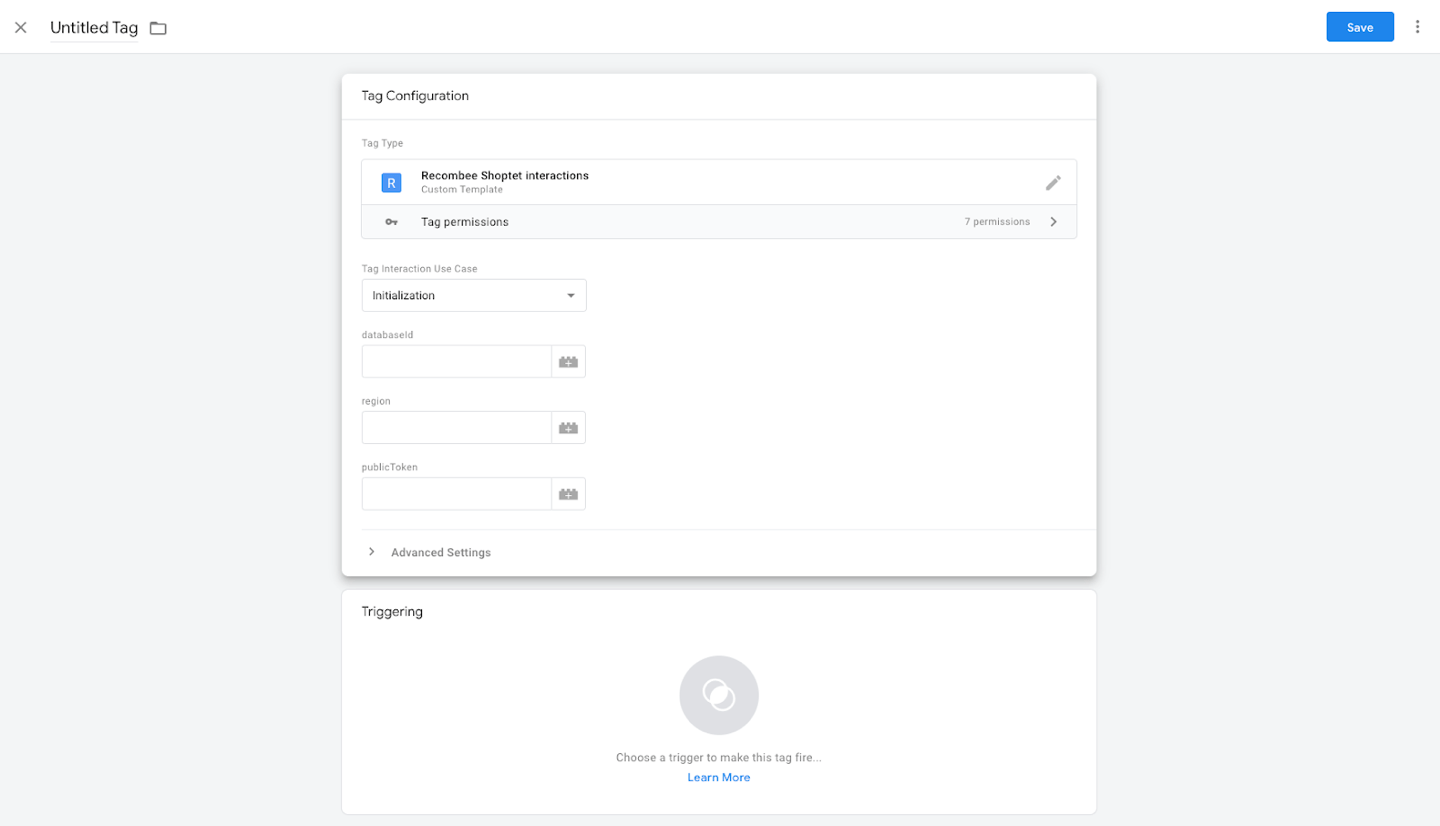
Initialization tag
We provide one tag with multiple types. You always need to create an initialization tag.
Tag that initializes the environment for sending interactions. You will need it for sending interactions to work.
- Select Initialization type in Tag Interaction Type
- Fill the Database ID with the ID of your Recombee database (e.g., `shoptet-gtm-example-prod`)
- Fill region of your database (e.g., eu-west)
- Fill public key
You can find all the information in the settings of your database in the Recombee admin.
Interaction tags
You can choose which interactions to send by creating a tag for each type.
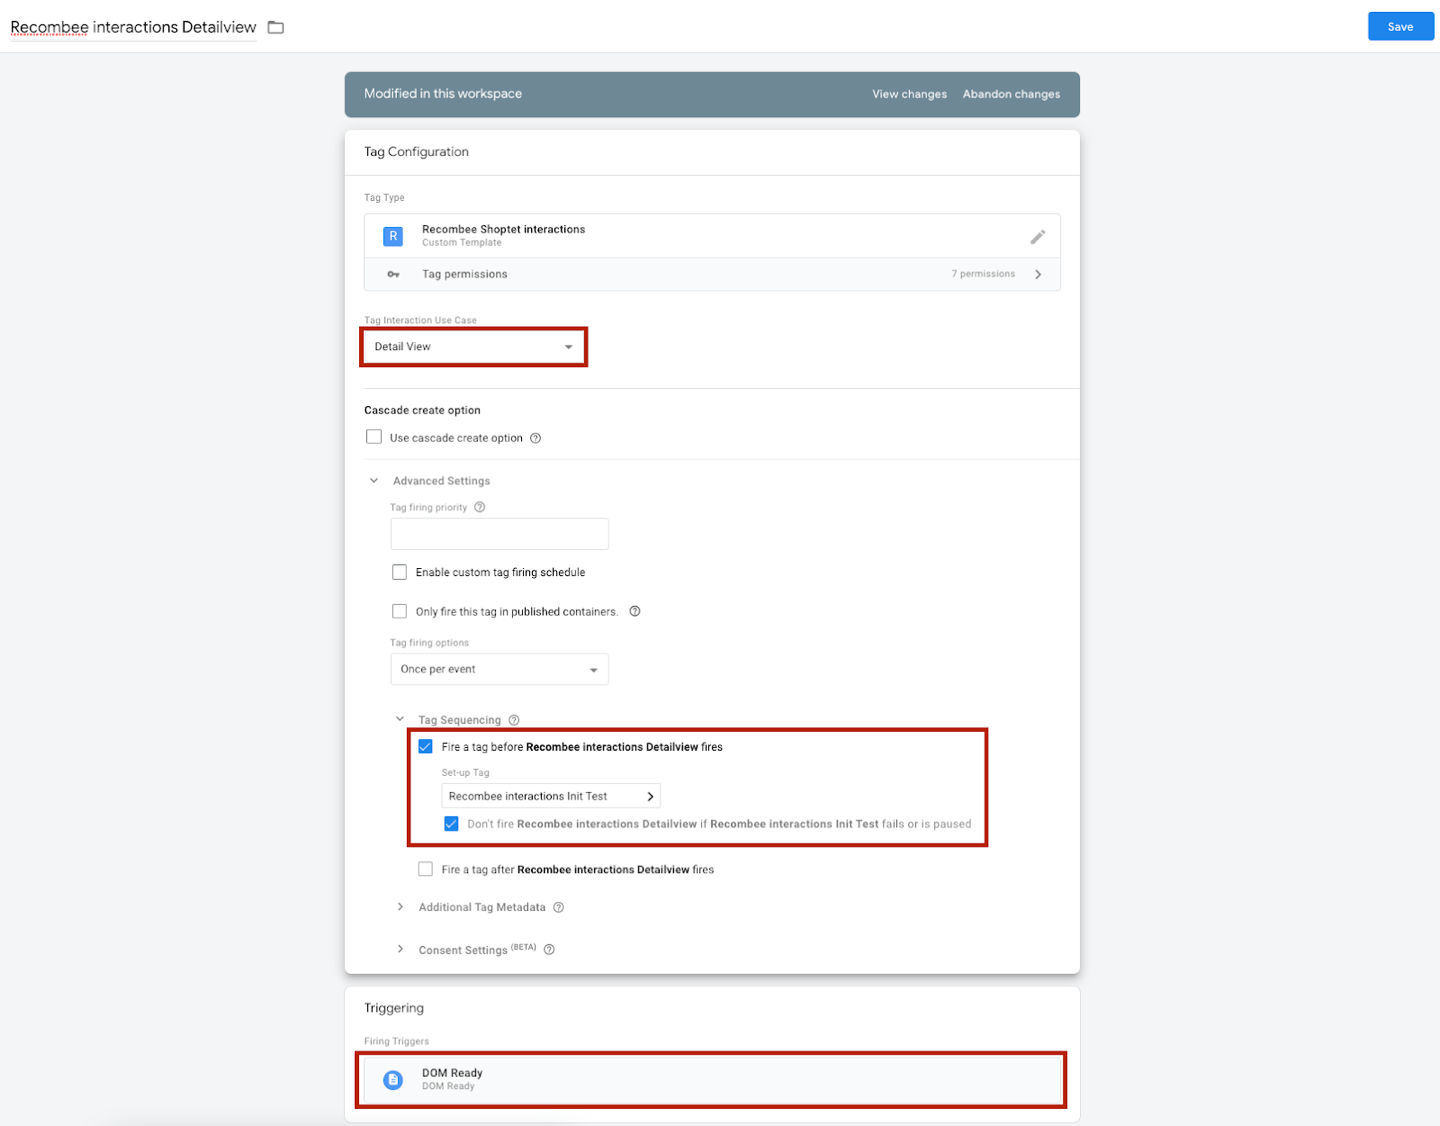
Detail view
To create a tag for Detail view interaction, select a Detail View option in Tag Interaction Use Case and name it accordingly.
Click on Advanced Settings and Tag Sequencing, choose Fire tag before xxx fires, and select your initialization tag created before.
For triggering, select the DOM Ready trigger created in the first steps.
Rating
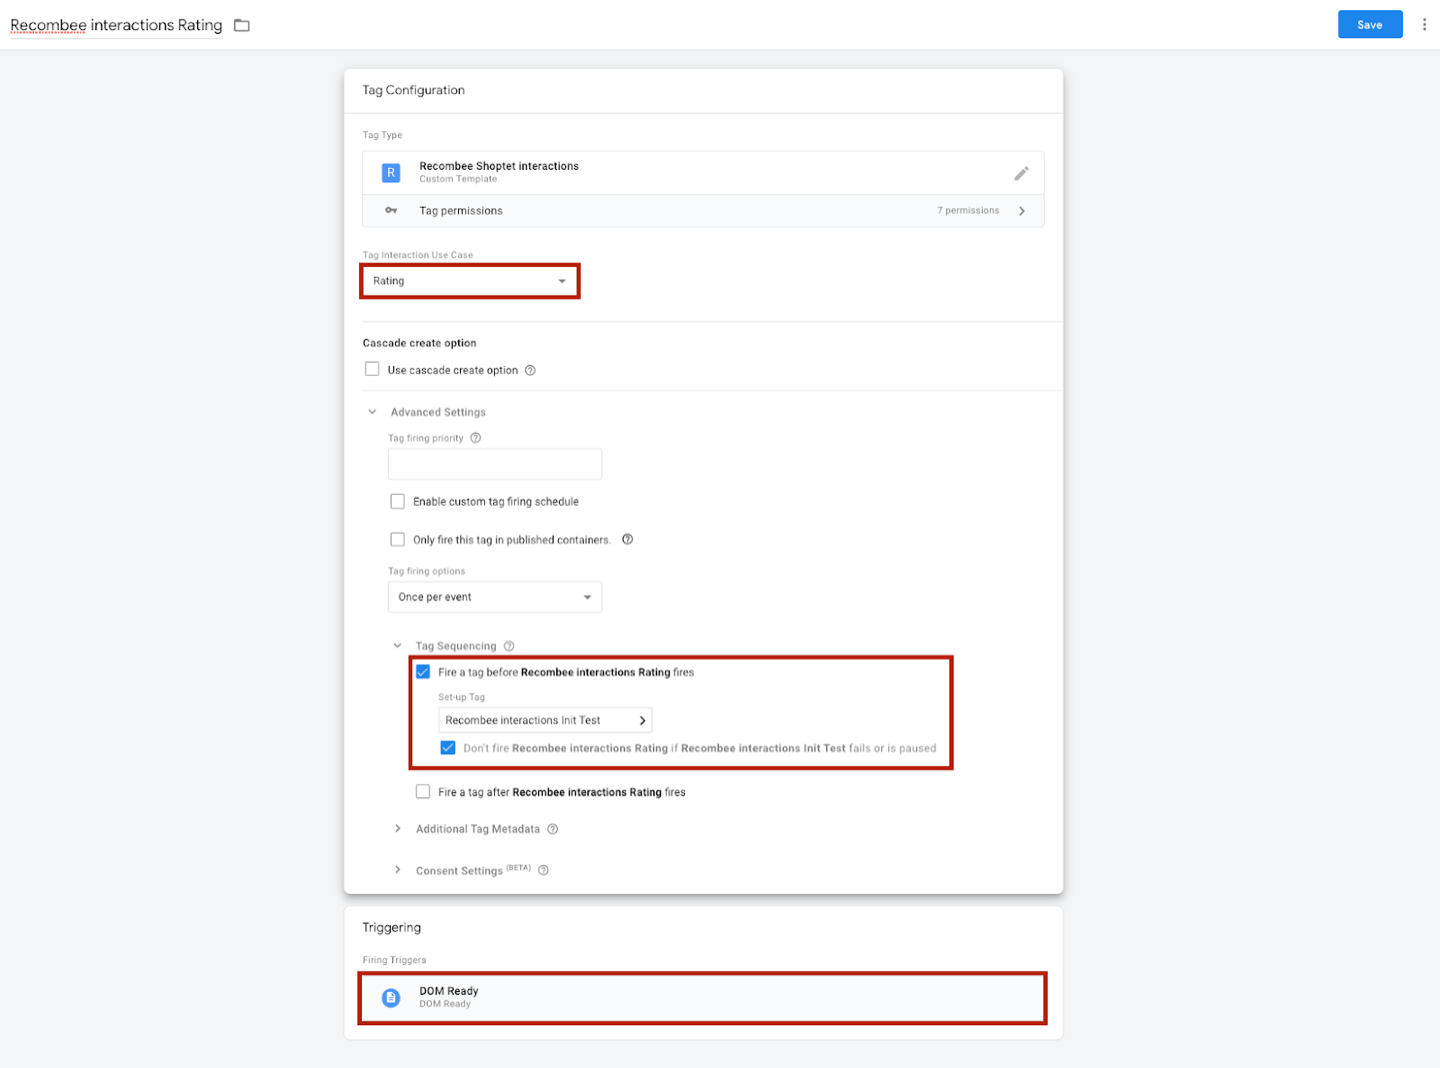
To create a tag for Rating interaction, select a Rating option in Tag Interaction Use Case and name it accordingly.
Click on Advanced Settings and Tag Sequencing, choose Fire tag before xxx fires, and select your initialization tag created before.
For triggering, select the DOM Ready trigger created in the first steps.
Purchase
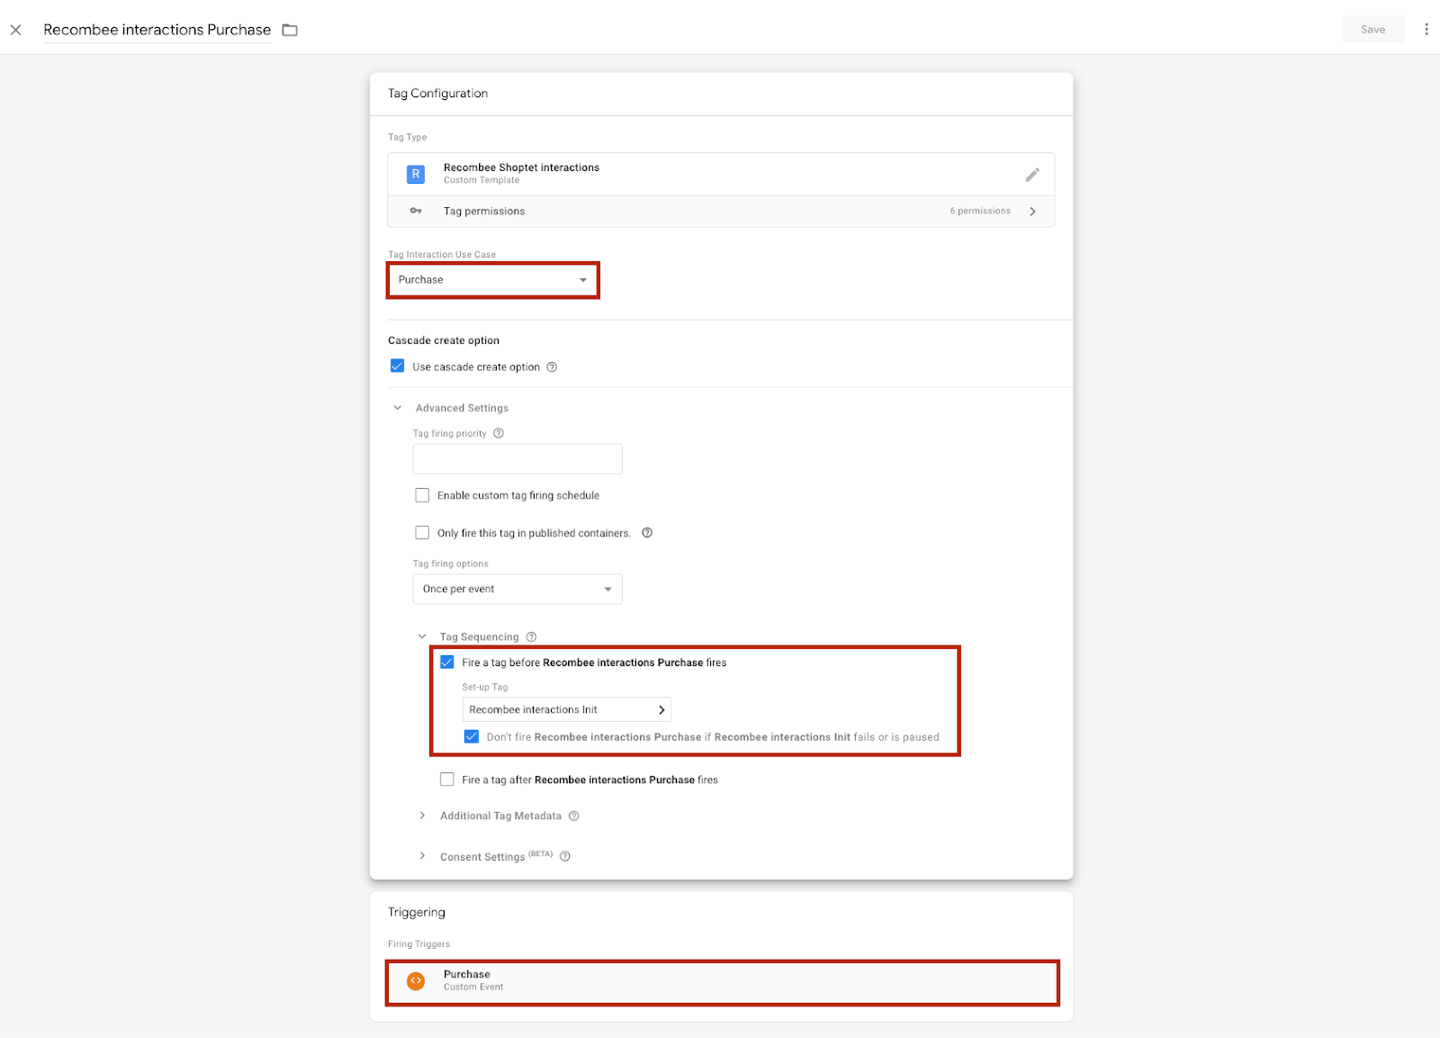
To create a tag for Purchase interaction, select a Purchase option in Tag Interaction Use Case and name it accordingly.
Click on Advanced Settings and Tag Sequencing, choose Fire tag before xxx fires, and select your initialization tag created before.
For triggering, select the DOM Ready trigger created in the first steps.
Cart addition
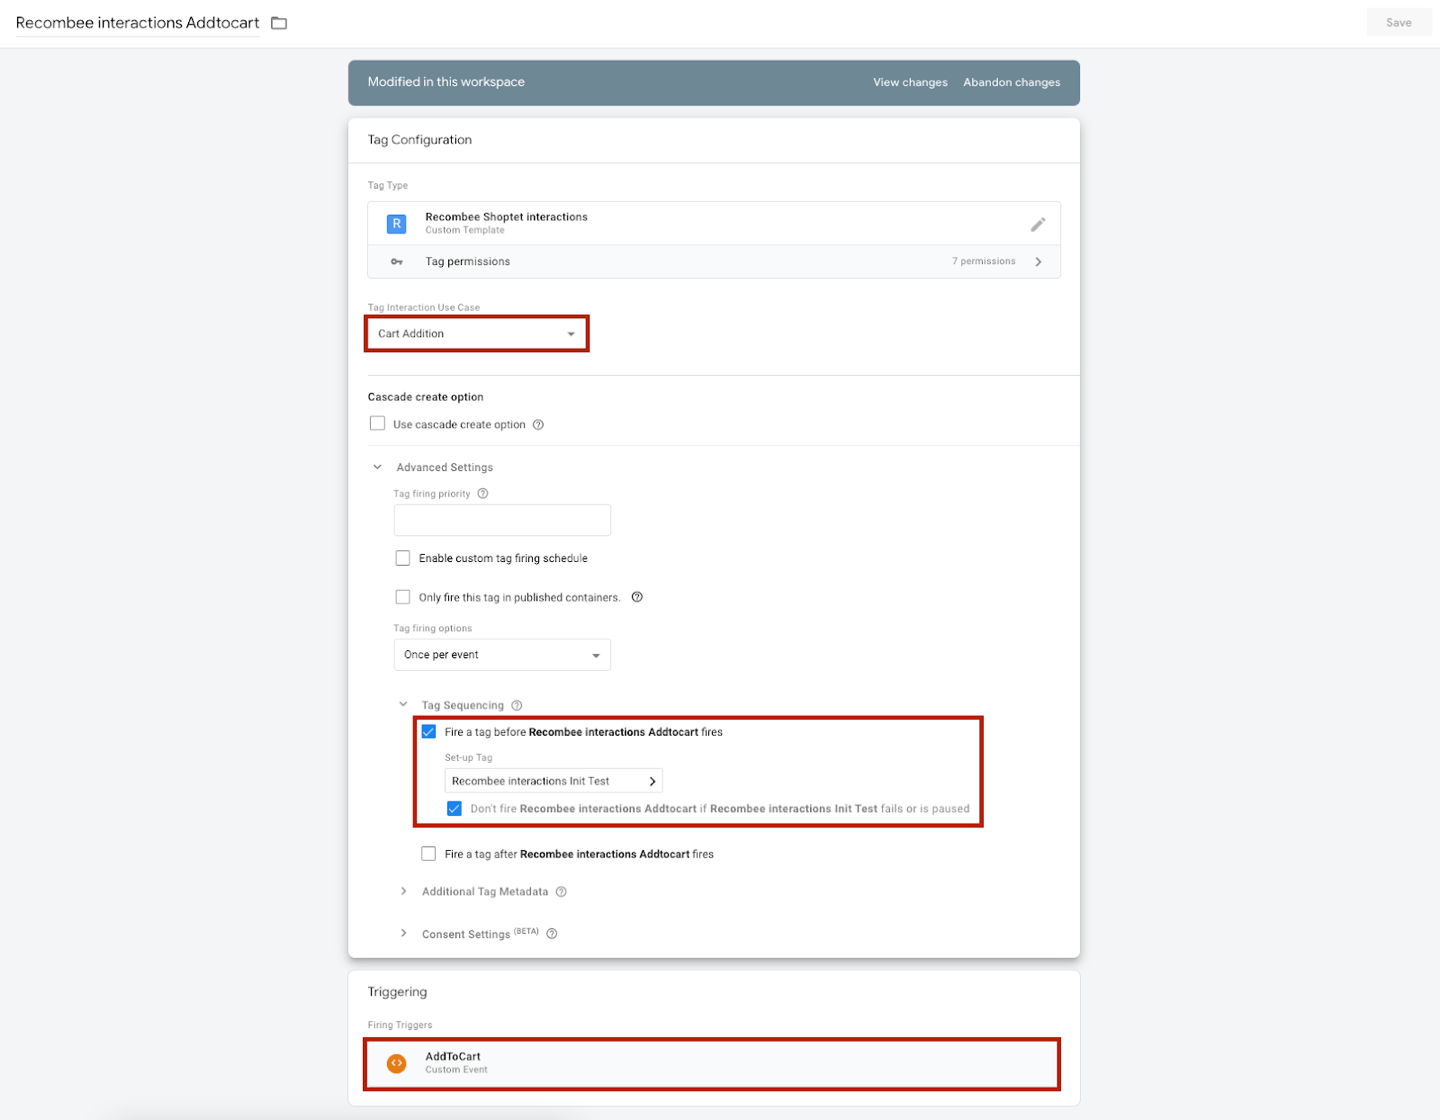
To create a tag for Rating interaction, select a Cart addition option in Tag Interaction Use Case and name it accordingly.
Click on Advanced Settings and Tag Sequencing, choose Fire tag before xxx fires, and select your initialization tag created before.
For triggering, select the AddToCart trigger created in the first steps.

