User Documentation
API Clients & Integrations
Scenario Recipes

The integration process consists of multiple steps. This manual assumes usage of Shoptet themes, but even if your e-shop is tailor-made, you will only need to change some names and everything will work as expected.
First of all, you need to create your Recombee account with a 30-day free trial.
Following steps:
Catalog feed gives Recombee access to your items and their properties (such as price, availability, etc.).
The scenario defines the way you want to show items to your customers.
Interactions represent the behavior of your customers, their preferences, and their taste. By sending us their interactions, Recombee can match what they would like to buy next.
Getting interactions
To track your customers in real-time, you need to install the Recombee tracking module on your page.
First, download the module here and save it as tracking_module.js.
It should look like this:
const publicToken = 'fFDj0Zkaz3036zLxmJWyy1jtbdvrgP4vL5vMHOklvMULjuD88qlPNk6Trv1ZlLYz';
const dbName = 'yourDatabaseName';
<!-- RECOMBEE LIBRARY FUNCTIONS, DO NOT REMOVE -->
<script src="https://cdn.jsdelivr.net/gh/recombee/js-api-client/dist/recombee-api-client.min.js"></script>
<script defer="" src="https://web-integration.recombee.com/v1/recombee.js"></script>
<!-- PURCHASE, CART ADDITION, DETAIL VIEW TRACKING and MERGE CUSTOMERS -->
<script src="https://504272.myshoptet.com/user/documents/upload/js/tracking_module.js"></script>
Your interactions should be working. Check it in your Recombee Admin UI and proceed to widget creation - a place on your site for recommendations.
You can create a No-Code Widget in our Admin UI or make one on your own. To make your No-Code Widget in the Admin UI, follow the steps at No-Code Widget.
Once your No-Code Widget is created:
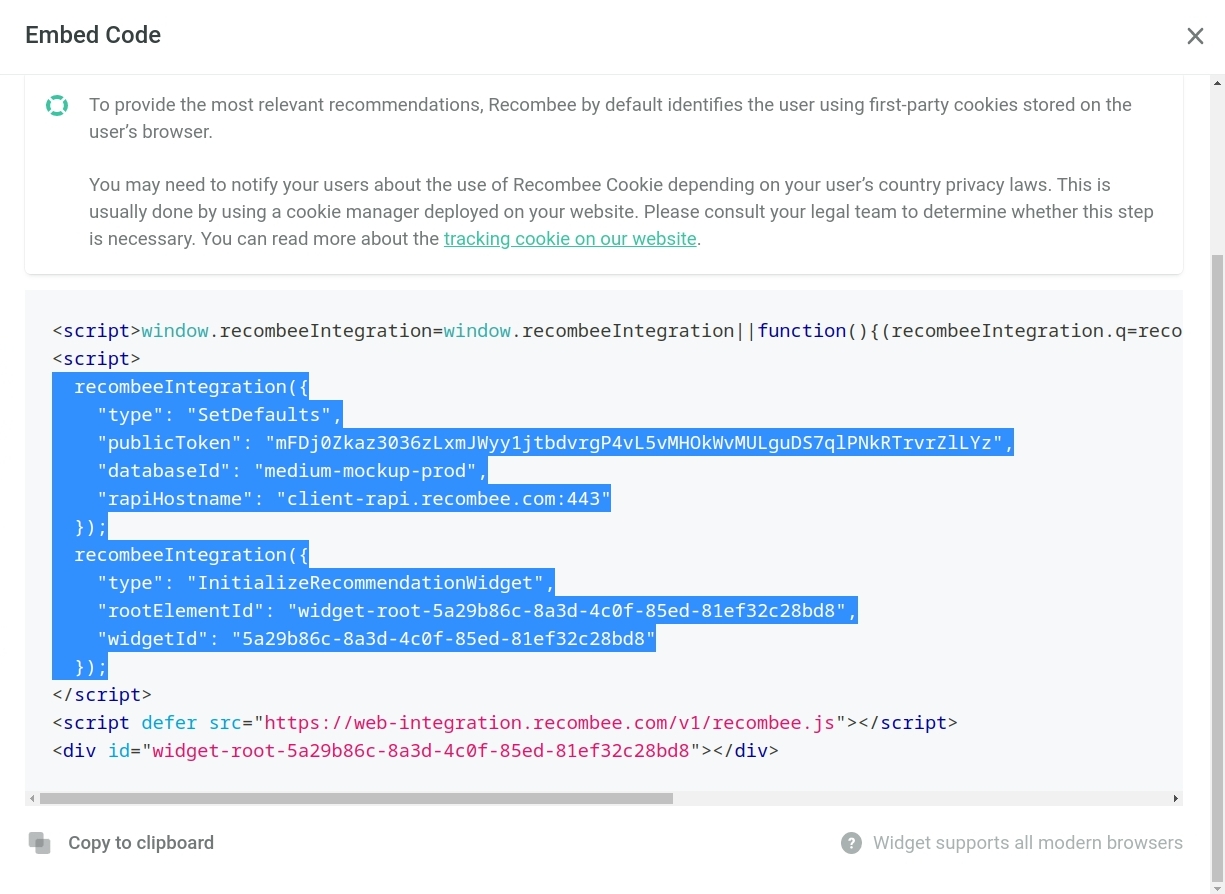
To show your No-Code Widget with recommendations on the site, you need to place it in a Shoptet banner or follow the steps in the following section Placing a widget using CSS.
To place an No-Code Widget in a Shoptet banner:
You can place an No-Code Widget anywhere on the site with our new feature Position of the widget.
Element anchor
First, you need to select an element on a specific page that will be used as an anchor. You can do it by opening the developer mode of the page and identifying the element selector. To learn more about element identifiers click here.
recombeeIntegration({
	"type": "InitializeRecommendationWidget",
	"rootElementId": "widget-root-3a6f7234-1811-4b60-aa28-1cacf99d0666",
	"widgetId": "3a6f7234-1811-4b60-aa28-1cacf99d0666",
	"appendToElementSelector": "<YOUR ELEMENT SELECTOR>"});
Notice the last line. Put your element selector there.
Examples of use with element selector div#description to place
No-Code Widget :
insertBeforeElementSelector: The widget will be inserted before the first element matching this selector:
"insertBeforeElementSelector": "div#description"
insertAfterElementSelector: The widget will be inserted after the first element matching this selector.
"insertAfterElementSelector": "div#description"
prependToElementSelector: The widget will be inserted as the first child of the first element matching this selector.
"prependToElementSelector": "div#description"
appendToElementSelector: The widget will be inserted as the last child of the first element matching this selector.
"appendToElementSelector": "div#description"
Save the file and exit.
JavaScript Shoptet Integration
<!-- WIDGET -->
<script src="https://504272.myshoptet.com/user/documents/upload/js/widget.js"></script>
If you want to add more widgets, upload the text file of widgets and add the same code as in the step above with the changed name widget.js to the name of your file.
Some pages can have specific widgets - for example, a page with the cart
or product detail page. To do it, nest the widget code in if condition
with a page keyword. Shoptet naming conventions give keywords for some
specific pages:
| Keyword | Page |
|---|---|
homepage | Homepage |
thankYou | Page after successful order |
productDetail | Page with details of a product |
cart | Page with cart content |
To position your widget on this site (e.g. cart):
if (dataLayer[0].shoptet.pageType === 'cart') { at the first line.} at the last line of your file.Example of widget visible only in the cart.
if(dataLayer[0].shoptet.pageType === 'cart') {
  window.recombeeIntegration = window.recombeeIntegration || function() {
    (recombeeIntegration.q = recombeeIntegration.q || [])
    .push(arguments);
  };

  recombeeIntegration.l = +new Date();
  recombeeIntegration ({
    "type": "SetDefaults",
    "publicToken": "mFDjOZkaz3036zLxmJWyy1jtbdvrgP4vL5vMHOkWvMULguDS7q1PNkRTrvrZ1LYz",
    "databaseId" : "medium-mockup-prod",
    "rapiHostname": "client-rapi.recombee.com:443"
  });

  recombeeIntegration({
    "type": "InitializeRecommendationWidget",
    "rootElementId": "widget-root-dab4bb53-0584-4b49-984f-1f5b2f4354a2",
    "widgetId": "dab4bb53-0584-4b49-984f-1f5b2f4354a2",
    "appendToElementSelector": "div.content-inner",
  });
}