User Documentation
API Clients & Integrations
Scenario Recipes
Item Segmentation is an abstraction on top of the catalog of Items. It allows you to group the Items into Segments based on their properties. The Segments can be then recommended to your users.

It is common to Segment the Items by:
Recommend Item Segments To User can be then used to recommend the top brands / top artists or actors / top categories or genres for a particular user.
It is also possible to get related Segments to a particular item (e.g. brands related to a product, artists related to a song), Segments related to another Item Segment (e.g. artists similar to a particular artist, brands related to a brand), or search within the Segments (search brands, artists, etc. with a search query).
There are multiple ways a Segmentation can be defined.
The most frequently used and the easiest to set up is Property-based Segmentation.
See this section for info on more advanced options for creating the Segmentations.
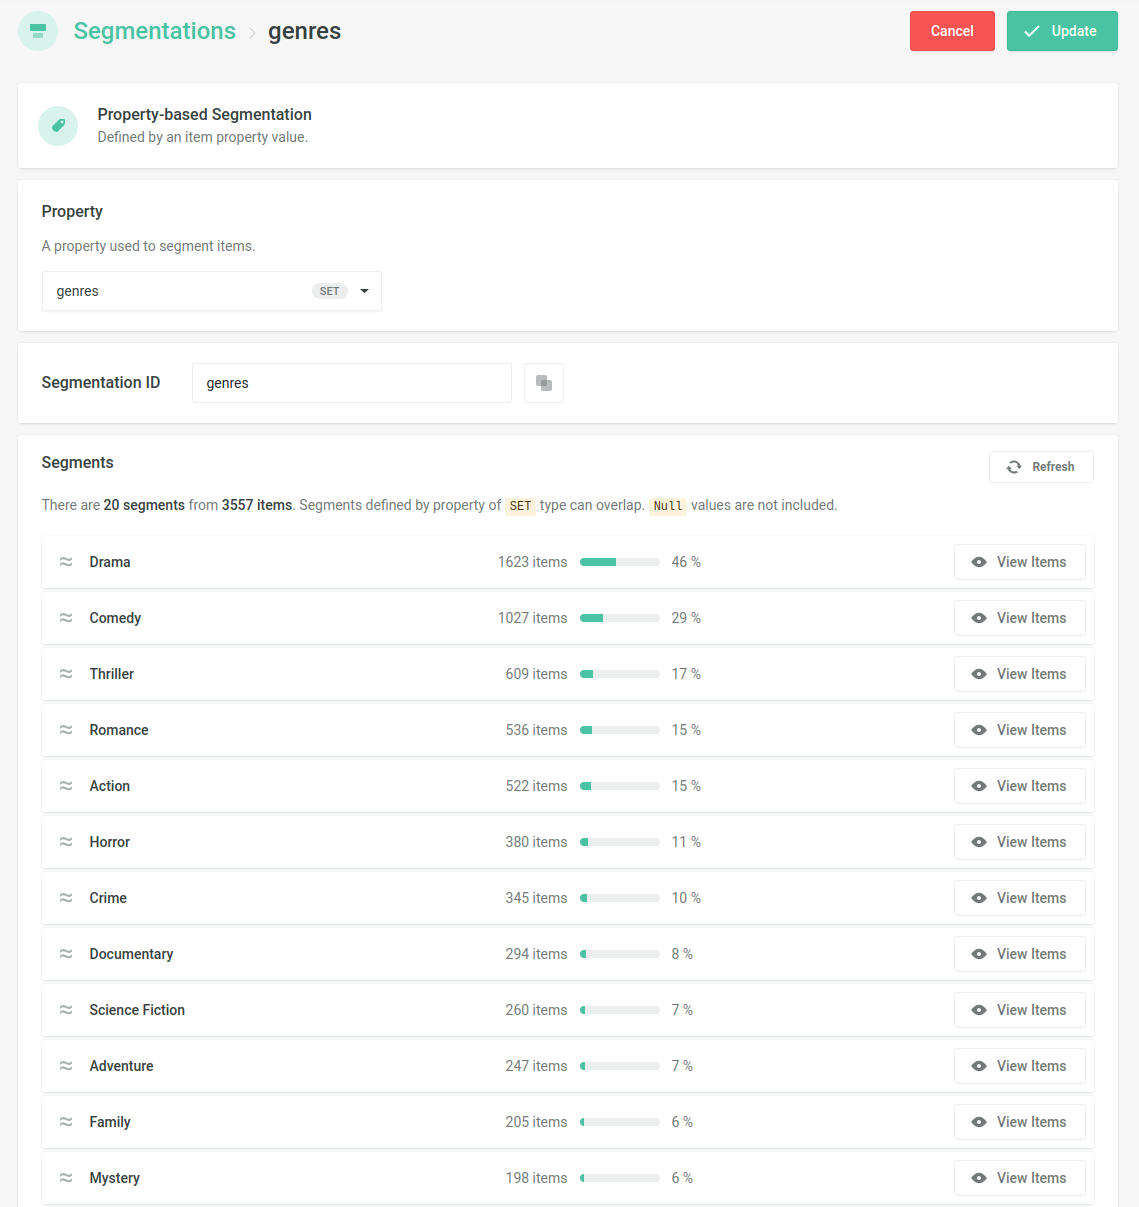
Property-based Segmentation groups the Items by the value of a particular property.
The property can be of string or set type.
NULL values are ignored.
Consider the following data about the Items:

Segmentation based on the country
property (of type string) will create the following three Segments:

For example, the value of the country
property for the it_crowd is GB, and
therefore the it_crowd belongs to the
GB Segment.
Segmentation based on the genres property
(of type set) will create the following three Segments:

Note that an Item can belong to multiple Segments: In that case, the_silence_of_the_lambs belongs to both
Horror and Thriller Segments.
The Segments can be recommended or searched using the following endpoints:
Before you can use any of that endpoints, you need to create an Item Segmentation and then set up a Scenario in the Admin UI which will use that Segmentation.
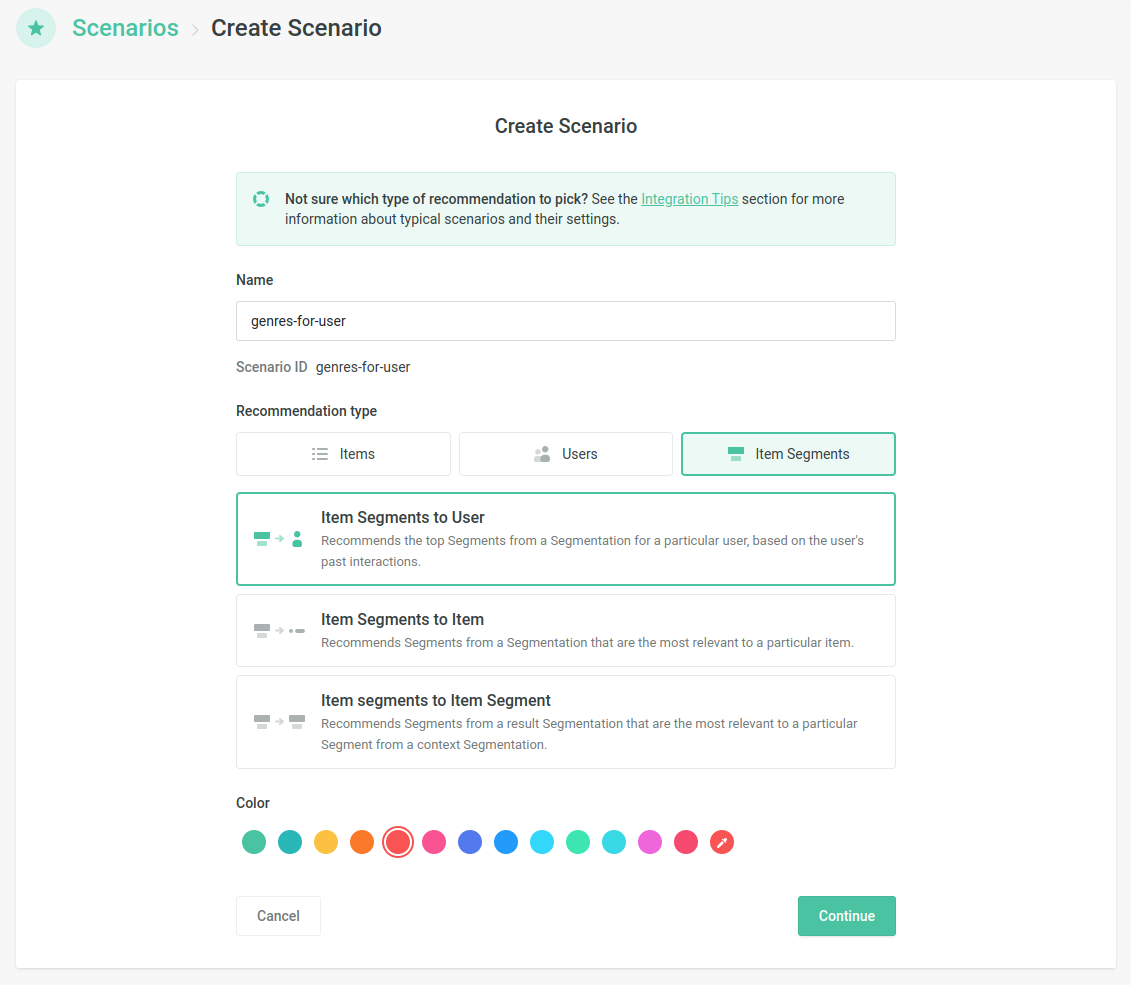
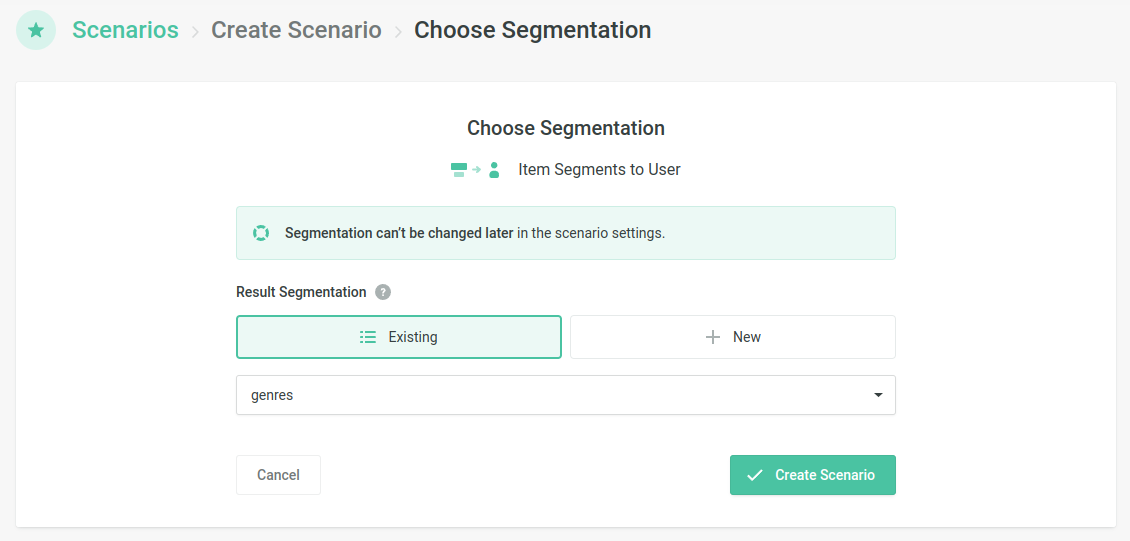
The ID of that Scenario needs to be provided in the scenario parameter
of the recommendation request:
client.send(
	new recombee.RecommendItemSegmentsToUser('2c169e', 5, {
		scenario: 'top_categories',
		cascadeCreate: true,
	}),
	(err, recommended) => {
		//...
	},
);
recommended = client.send(RecommendItemSegmentsToUser('2c169e', 5,
							scenario='top_categories',
							cascade_create=True))
recommended = client.send(RecommendItemSegmentsToUser.new('2c169e', 5,
{
	'scenario' => 'top_categories',
	'cascadeCreate' => true
})
)
RecommendationResponse recommended = client.send(new RecommendItemSegmentsToUser("2c169e", 5))
.setScenario("top_categories")
.setCascadeCreate(true);
$recommended = $client -> send(new Reqs\RecommendItemSegmentsToUser('2c169e', 5,
																	[
																		'scenario' => 'top_categories',
																		'cascadeCreate' => true
																	])
							);
RecommendationResponse recommended = client.Send(new RecommendItemSegmentsToUser("2c169e", 5,
								scenario: "top_categories",
								cascadeCreate: true));
client.send(new rqs.RecommendItemSegmentsToUser('2c169e', 5,
	{
		'scenario': 'top_categories',
		'cascadeCreate': true
	}
	),
	(err, recommended) => {
	//...
	}
);
GET /myDb/recomms/users/2c169e/item-segments/?count=10&scenario=top_categories&cascadeCreate=true
These are some examples of how recommending Segments can be used on your website or in your app:
Recommended Segments can be filtered or boosted using ReQL. You
can access the ID of a Segment in ReQL using 'segmentId'.
Examples of filters:
Do not recommend the coupons category to the users
'segmentId' != "coupons"
Do not recommend horror movies to kids
if context_user["is_child_profile"] then 'segmentId' != "Horror" else true
Example of a booster:
Boosting the Editors Pick section
if 'segmentId' == "Editors Pick" then 2 else 1
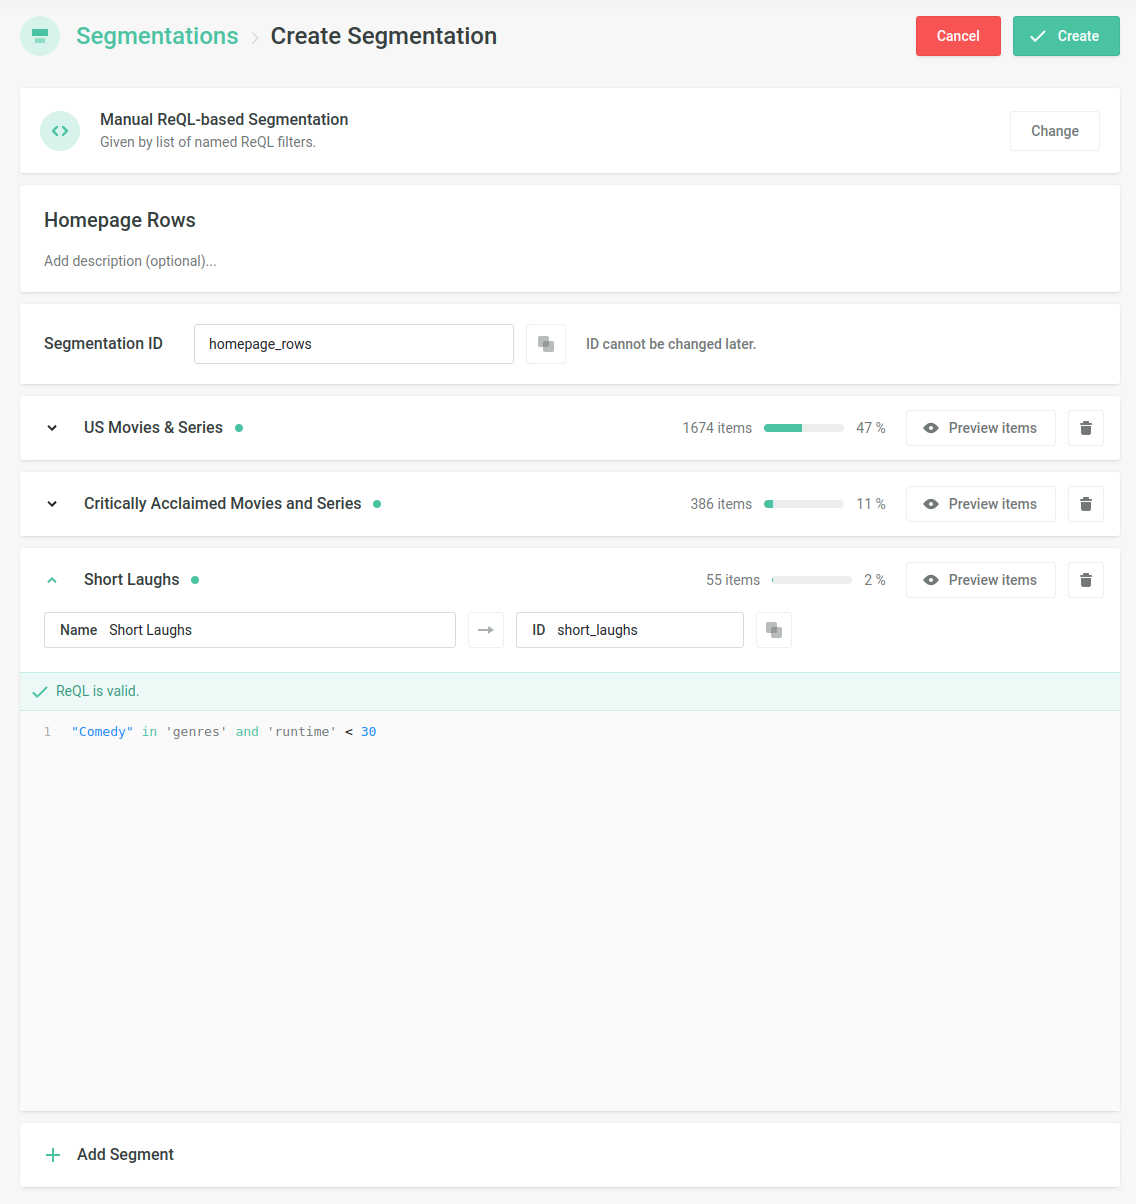
With Manual ReQL Segmentation, you specify individual Segments of the Segmentation.
Each Segment is defined by a ReQL filter: Items passing the filter belong to the Segment.
Consider the same data about the Items as in this section.
You can create an Item Segmentation where each Segment will represent one row on the homepage.
With defined Segments as follows:

Items get segmented in this way:

You will get the optimal order of these homepage rows for the particular user by calling the Recommend Item Segments To User endpoint.
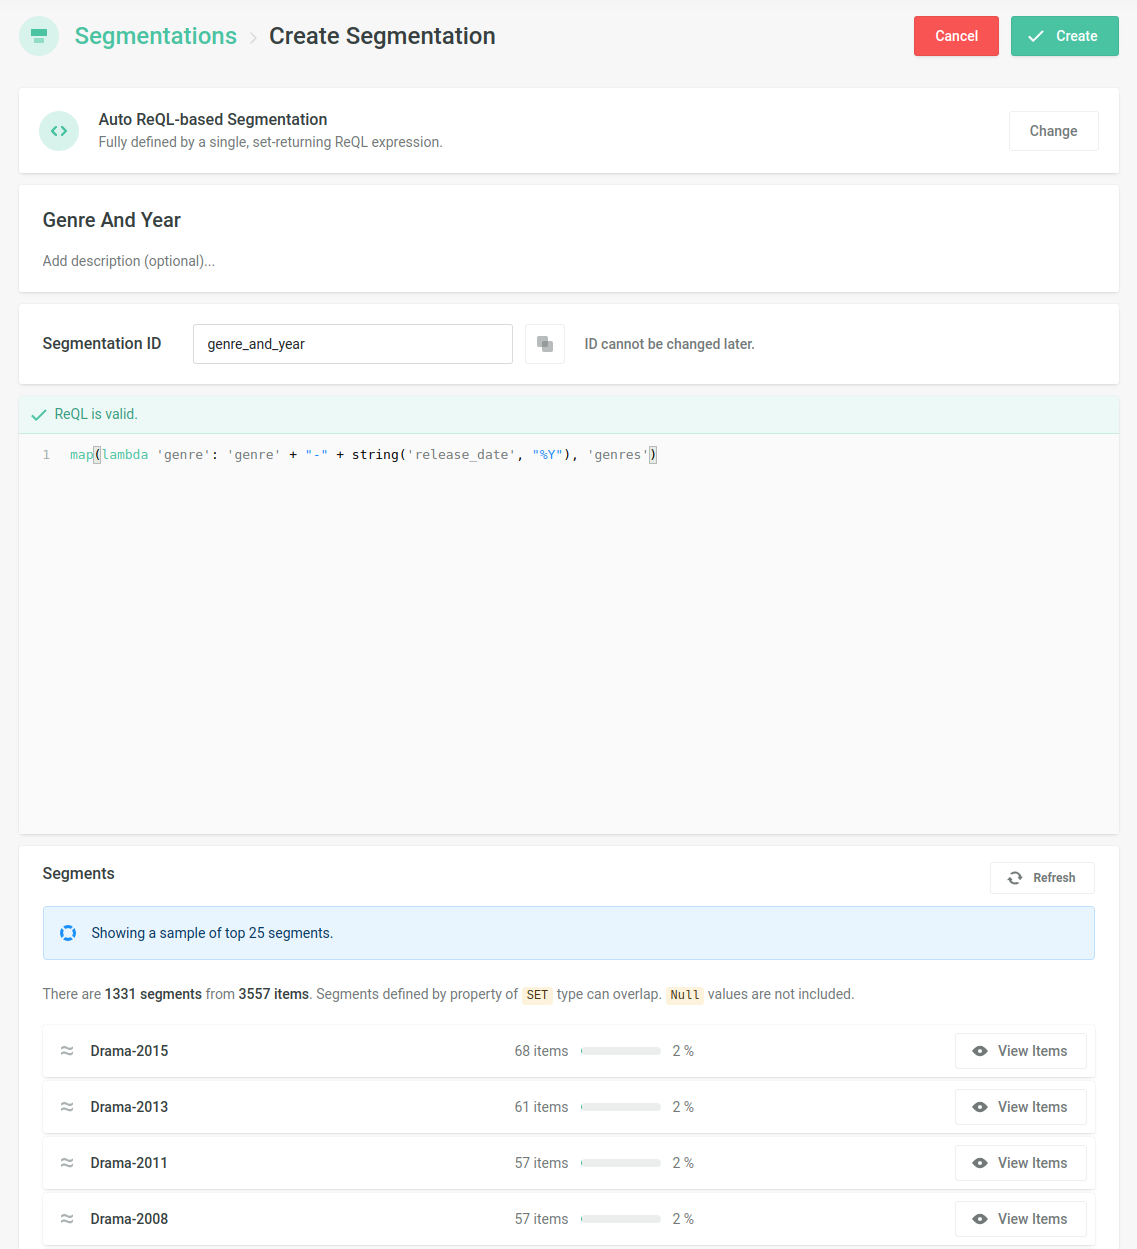
Auto ReQL Segmentation is specified by a ReQL expression that for each Item returns a set of Segments to which the Item belongs.
The individual Segments don't need to be predefined in any way.
The following expression returns the set of genres:
'genres'
For example, for johnny_english it
returns {"Comedy"} and for the_silence_of_the_lambs it returns
{"Horror", "Thriller"}.
Therefore it behaves the same as the Property-based Segmentation using the genres property:

The following Segmentation put the Items into Segments according to
their genres and also adds a
Critically Acclaimed Segment for items with
'critically_acclaimed' == true.
'genres' + (if 'critically_acclaimed' then {"Critically Acclaimed"} else {})
For example, for johnny_english it
returns {"Comedy"}, for friends it
returns {"Comedy", "Critically Acclaimed"}, and for the_silence_of_the_lambs it returns {"Horror", "Thriller", "Critically Acclaimed"}.

The Segments of the following Segmentation are a combination of the Item's genres and country (British comedies, US thrillers, etc.).
map(lambda 'genre': 'genre' + "-" + 'country', 'genres')
For example, for johnny_english it
returns {"Comedy-GB"}, for friends it
returns {"Comedy-US"}, and for the_silence_of_the_lambs it returns
{"Horror-US", "Thriller-US"}.